Adapt Your Braiding Technique for Straight, Wavy, and Curly Textures
Each hair type demands a unique approach. For straight hair (Type 1), grip is the main challenge. Use a texturizing spray or dry shampoo before braiding to create friction. For wavy hair (Type 2), braid when slightly damp to enhance wave pattern within the braid. Curly hair (Type 3) offers natural grip but requires extra moisture—apply a leave-in conditioner to prevent snapping. Coily hair (Type 4) is ideal for braiding due to its texture, but always detangle thoroughly with a wide-tooth comb and work in small sections. For all types, avoid braiding freshly washed hair without product; a light gel or cream provides necessary hold and reduces flyaways.
Short Hair Solutions: Mini Braids, Braided Bangs, and Scalp Designs
Length under four inches doesn’t mean limited options. Mini braids work beautifully on short hair—section into half-inch squares and braid close to the scalp, leaving the ends loose for a textured crop look. Braided bangs are another winning choice: isolate the front hairline, https://www.successhairbraidingmd.com/ create three small cornrows going sideways, and pin the ends behind the ear. Scalp designs like zigzag cornrows or heart-shaped partings turn short hair into an artistic canvas without needing length. For added drama, use temporary hair chalk on the short ends before braiding. Always secure short braids with small elastic bands at the ends, and reapply a lightweight gel daily to keep roots neat.
Long Hair Mastery: Preventing Bulk and Managing Weight
Long hair (past shoulders) requires strategies to avoid heavy, lumpy braids. First, thin out the ends using the “invisible finish” technique: as you reach the last two inches of the braid, stop adding new hair and continue a simple three-strand braid to taper naturally. For very thick long hair, divide into two or three parallel braids instead of one massive one. When creating a single long braid, start with a loose tension at the roots and increase tension gradually toward the ends—this distributes weight evenly and prevents scalp pulling. To manage length, fold the finished braid into a loop and secure with pins for an elegant updo, or weave it into a crown. Use silk scrunchies instead of rubber bands to prevent breakage at the ends.
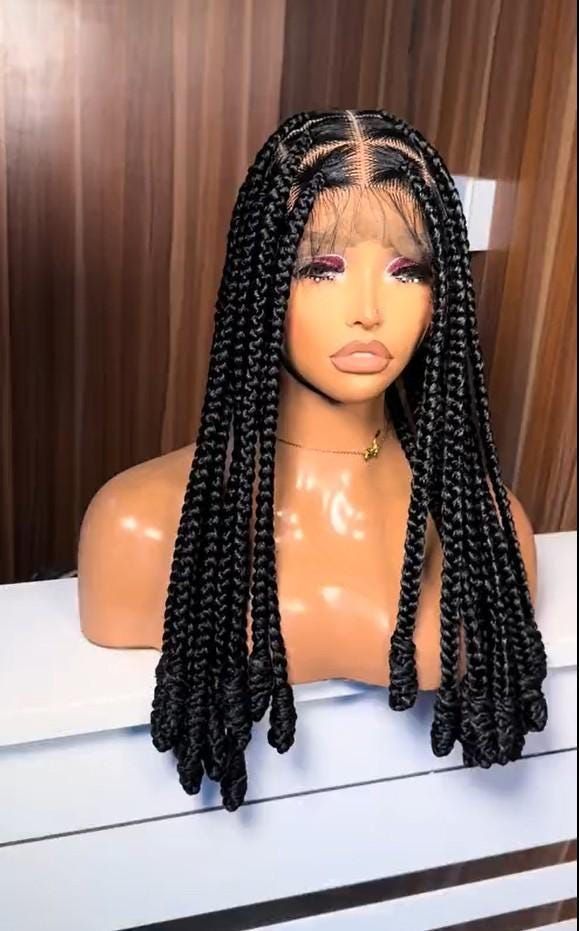
Extension Integration for Length and Volume Enhancement
Adding extensions opens braiding possibilities for all natural lengths. For short hair, use premade braiding hair with a looped end—feed your natural hair into the loop and braid together. This method adds 12–16 inches instantly. For medium hair, try the “invisible knot” technique: fold the extension hair over a small piece of your natural hair, then braid all three strands together. Match extension texture to natural hair: kanekalon for straight to wavy, human hair blends for curly to coily. Always pre-stretch synthetic extensions by running a warm flat iron over them (low heat) to reduce bulk and tangling. Color-match at the roots even if you plan an ombre effect; mismatched roots look unnatural. For long-term wear (4–6 weeks), use smaller sections (1/4 inch) to reduce tension on natural hair.
Textured Finishes for Every Length: Frizz Control and Shine
Regardless of hair length or type, the finish determines success. Immediately after braiding, apply a light oil (argan or jojoba) to your palms and run them lightly over the braids—not the scalp—to seal the cuticle. For frizzy braids, use a foam wrap lotion and tie down with a satin scarf for 20 minutes. To add shine without residue, mist a shine spray from 12 inches away. For curly or coily hair types, smooth each braid with a small amount of aloe vera gel before the final pass of your fingers. For very short hair, use a boar-bristle brush to lay edges before braiding, then apply edge control after each braid is complete. These finishing steps ensure braids look polished on day one and remain tidy through day seven.